How did you use media technologies in the construction and research, planning, and evaluation stages?
In order to present my research and planning, and evaluation, I needed to create it in blog form using 'Blogger', a website which allows you to create a blog through your Google account. 'Blogger' is a website on the internet. The internet was an integral part of my research and planning. I used Google Chrome, and accessed numerous websites such as 'dafont.com' and 'fontyukle.com', websites that allowed me to choose a font for my media products, and 'impaawards.com', a website that contains thousands of magazine posters for me to analyse, obtain ideas for my tagline billing etc. The internet also provided me with 'Youtube', a website that allows you to upload and watch videos. It was here that I was able to research teaser trailers, and gain ideas and inspiration for my own teaser trailer. Other internet based websites that I used to create my media products were Google Docs, which helped me create my shot list for my teaser trailer, and Spotify (although this can run without internet), a music application which allows you to stream music instantly (I used this to find the music for the opening part of my teaser trailer).


 I used Photoshop Elements for the creation of all my ancillary texts. I used it to create my Poster and Magazine Front Cover, and to create the still images in my Teaser Trailer, including taglines, billing, social media links, and release dates. Photoshop Elements is an easy and quick way to design and create to design media products such as the ones I created as it is laid out in a simple way so that even someone using it for the first time, such as myself, could find a way to understand how to use it, and make the best possible product as possible.
It offered me a huge amount of different tools to use in order to maximise the potential of my product. Due to the majority of my poster and magazine cover requiring text, I mainly used the text box tool, which requires you to drag a box in your desired place, pick a font and font size, and write whatever I wanted.


For my poster, I created a black background, and the first thing I did was obtain my pre-cropped photo of my main character, which I filled in white, so as to contrast against the black background, and highlight his positive role in my film. I added my billing and inserted my tagline, which I would later change due to personal preference, at the top of the poster.

I then added the film name and main actor name in the space between the picture of the star and the billing. I originally made the font of the film name smaller than the tagline, which I would later change, as it is required for the film name to be the largest text on a poster.

I then added ratings and reviews to my poster which are essential for the marketisation of my film. I also added my production company logos which I had chosen during my research, and I then proceeded to play around with my design. I decided at this point to change my tagline, and also refrain from using only white text, as I decided to use red text as well to add a different dimension to my poster.

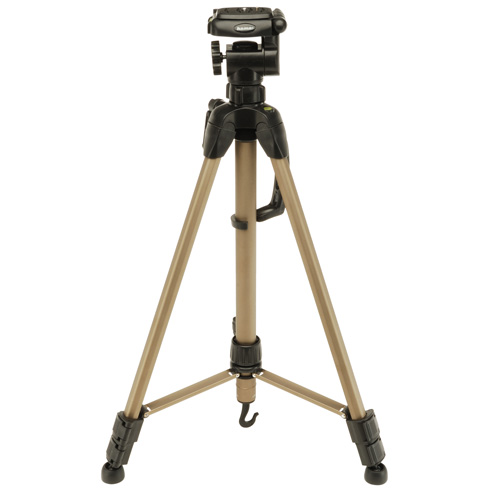
To film the shots for my teaser trailer I used a Panasonic HDC TM900 on a Hama Star Tripod. The Panasonic is a state-of-the-art camera that allowed me to capture the best quality shots possible. Alongside the qualities of the shots it can capture, the Panasonic also has many other abilities that aided me during my filming, such as the ability to review all of my shots at the click of a button, as well as allowing me to delete those that I did not approve of. This was all made easy thanks to the pop-out touch screen connected to the camera. This made recording and viewing my shots extremely easy as you were able to film with comfort and also made it possible to line up my shots a lot easier.
It was also extremely easy to take different kinds of shots on this camera, such as out of focus shots. This was all possible from the click of a button. The Hama Star Tripod was also very helpful in securing difficult shots at awkward angles, and meant that all my shots would be guaranteed to be steady as they were not all being filmed from my hands.


In order to present my research and planning, and evaluation, I needed to create it in blog form using 'Blogger', a website which allows you to create a blog through your Google account. 'Blogger' is a website on the internet. The internet was an integral part of my research and planning. I used Google Chrome, and accessed numerous websites such as 'dafont.com' and 'fontyukle.com', websites that allowed me to choose a font for my media products, and 'impaawards.com', a website that contains thousands of magazine posters for me to analyse, obtain ideas for my tagline billing etc. The internet also provided me with 'Youtube', a website that allows you to upload and watch videos. It was here that I was able to research teaser trailers, and gain ideas and inspiration for my own teaser trailer. Other internet based websites that I used to create my media products were Google Docs, which helped me create my shot list for my teaser trailer, and Spotify (although this can run without internet), a music application which allows you to stream music instantly (I used this to find the music for the opening part of my teaser trailer).


It offered me a huge amount of different tools to use in order to maximise the potential of my product. Due to the majority of my poster and magazine cover requiring text, I mainly used the text box tool, which requires you to drag a box in your desired place, pick a font and font size, and write whatever I wanted.
For my poster, I created a black background, and the first thing I did was obtain my pre-cropped photo of my main character, which I filled in white, so as to contrast against the black background, and highlight his positive role in my film. I added my billing and inserted my tagline, which I would later change due to personal preference, at the top of the poster.

I then added the film name and main actor name in the space between the picture of the star and the billing. I originally made the font of the film name smaller than the tagline, which I would later change, as it is required for the film name to be the largest text on a poster.
I then added ratings and reviews to my poster which are essential for the marketisation of my film. I also added my production company logos which I had chosen during my research, and I then proceeded to play around with my design. I decided at this point to change my tagline, and also refrain from using only white text, as I decided to use red text as well to add a different dimension to my poster.

To film the shots for my teaser trailer I used a Panasonic HDC TM900 on a Hama Star Tripod. The Panasonic is a state-of-the-art camera that allowed me to capture the best quality shots possible. Alongside the qualities of the shots it can capture, the Panasonic also has many other abilities that aided me during my filming, such as the ability to review all of my shots at the click of a button, as well as allowing me to delete those that I did not approve of. This was all made easy thanks to the pop-out touch screen connected to the camera. This made recording and viewing my shots extremely easy as you were able to film with comfort and also made it possible to line up my shots a lot easier.
It was also extremely easy to take different kinds of shots on this camera, such as out of focus shots. This was all possible from the click of a button. The Hama Star Tripod was also very helpful in securing difficult shots at awkward angles, and meant that all my shots would be guaranteed to be steady as they were not all being filmed from my hands.

Before editing, I had to record all my voice-overs and obtain the sound effects that I wanted to use in my trailer. We recorded the voice-overs using a Shure SM58 microphone with a pop shield in front of it. This muffled out any unwanted popping noises and ensured for quality sound, and made it sound authentic and professional. The recorded sounds was accessed on a soundboard, where I could edit and control the sounds produced and prepare them for immediate placing in the teaser trailer. I did not need to record any sound effects as I obtained them all from my college's sound effect library.
Once I had done that, I then had to be edit all my shots together with the music on Avid Media Composer. Avid Media Composer is an editing tool used for making videos, using shots taken from the camera and editing them together with music, making it look authentic in the process.
I began by sorting all my shots into categories and placing them into 'bins'. These bins made it easy to go through specific shots and allowed me to find the shots I needed with ease. Each shot had a thumbnail on it which allowed me to see what each shot was from the picture, which made it even easier to tell the difference between the shots and place them in bins, as all my shots, as you will see in the pictures below, do not have any distinctive names placed on them.


Once all my shots were organised, I was able to create my teaser trailer by using Avid to place each shots after each other using a timeline to measure and perfectly place each shot. The timeline was especially helpful as it allowed me to place things in layers. This means that I was able to easily structure the combination and timing of my shots with sound effects and non-diegetic music.
I was able to view both the selected shot, and the overall work produced side-by-side on a viewing screen, so as to constantly check and make sure that I have no made any mistakes or want to change anything. I was able to add effects on my shots, for example, I used 'fade' on my establishing shots, so as to ensure a flow at the opening of my trailer.


No comments:
Post a Comment